- Printing Rules
Printing Rules
- Getting started
- Account
- Create Campaign
- Design
-
Flyering and Door to Door
- Audience
- Flyer builder
- Upload design
- Details
- Review and Submit
- Quotes and fees
- Live Campaign
- Flyer Formats
-
Every Door Direct Mail
- Segments
- Upload Design
- Details
- Review and Submit
- Live Campaign
- Printing Rules
- How we work
-
BAs and Mistery shoppers
- What is the process for selecting Brand Ambassadors (BAs) for my campaign?
- Is it possible to request Brand Ambassadors (BAs) who speak a specific language for my campaign?
- What is the training process for Brand Ambassadors (BAs)?
- Is it possible for me to use my own mystery shoppers as part of a campaign?
- Why does Oppizi pay bonuses to its Brand Ambassadors (BAs)?
-
Distribution
- What is involved in the planning process for a campaign and how long doest it typically take?
- Does Oppizi provide branded uniforms or other promotional materials for Brand Ambassadors (BAs) to wear during campaigns?
- How can I calculate the number of missions for my campaign?
- How many flyers can you distribute per day, week or month?
- Why do I need to provide codes? Why are they important?
-
Quality/Control
- How are the missions supervised?
- How do you ensure that Brand Ambassadors (BAs) are promoting my product or service effectively?
- What measures do you have in place to prevent cheating or unethical behavior from Brand Ambassadors (BAs) during campaigns?
- How does Oppizi track the number of scans during a campaign?
-
FAQ
- What is a client pitch and what information does it typically include?
- What can I do on the Software once a campaign is live?
- When can I expect my campaign to start and what factors may impact the start date?
- Is it possible for me to use my own printer as part of my campaign?
- What are my options if I want to pause or cancel my campaign?
What should I be aware of when uploading my artwork?
There are a few key concepts, terms, and elements that you should be familiar with when creating your artwork for your EDDM campaign.
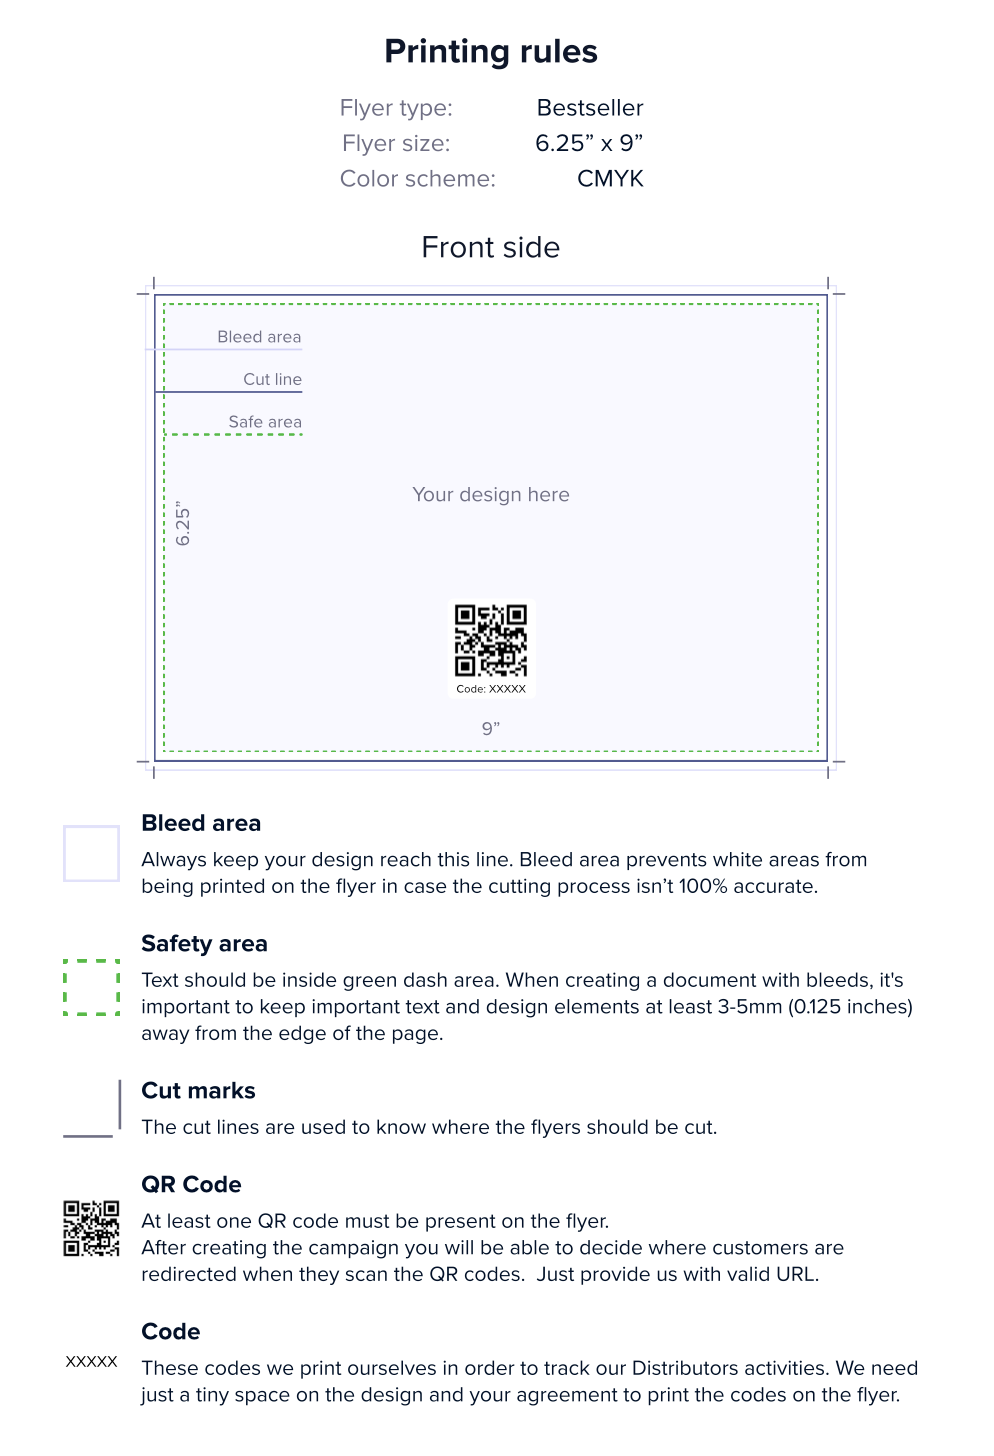
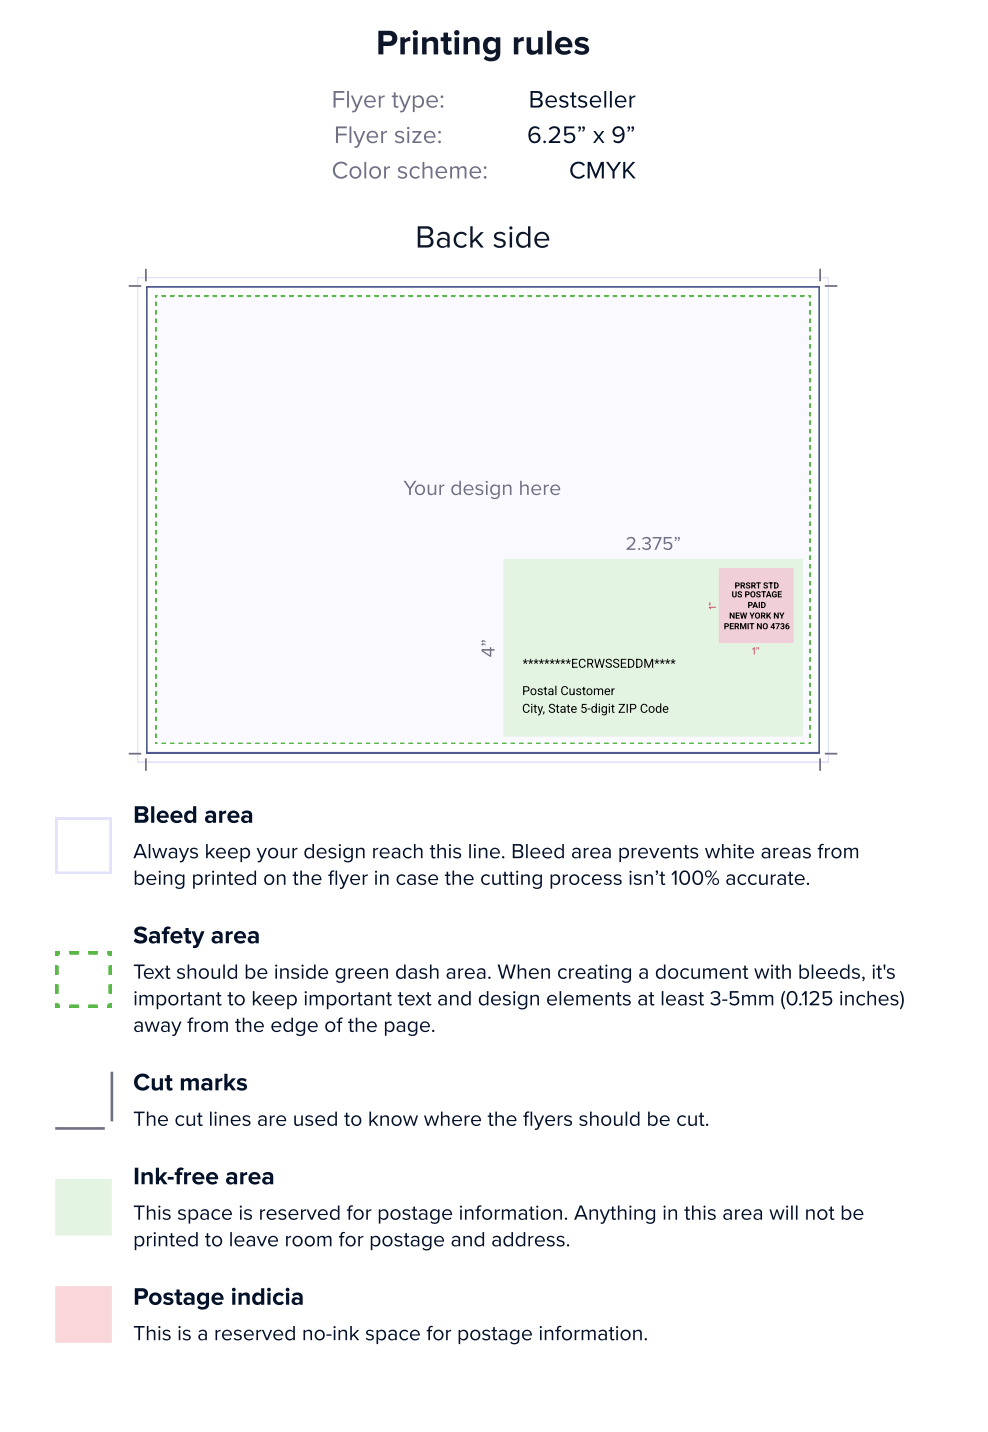
- Bleed area: The bleed area is the extra space added to the edges of your design file. It is designed to ensure that your artwork is printed all the way to the edge of the final product, without any white spots or unprinted areas. When your design is printed, it will be trimmed down to fit the final size of the flyer or other materials.
- Cut marks: The cut lines are used to indicate where the flyers should be cut. Any artwork that extends into the bleed area will be trimmed down to the size of the final product.
- Safety area: The safety area is the area within your design where you should place the most important content to ensure that it is not trimmed off during the printing process. It's important to keep these important elements inside the safety area, at least 3-5mm (0.125 inches) away from the edge of the page.
- Ink-free area: This is the space reserved for postage information. It is a space in your design that you must leave empty in order for us to add the postage information.


How does the QR Code work on my artwork?
You do not need to provide us with the final QR Codes for your campaign. Instead, leave a space or a QR Code as a placeholder in your artwork. We will ask you to provide us with a URL where you would like your QR Code to direct to, and we'll do the rest!
We will create personalized QR Codes for the distribution areas you selected when creating your campaign, place the QR Code image in your artwork, and direct the recipients to your desired URL.
Once your mail pieces are delivered, you will be able to track the scans of your EDDM campaign through your campaign dashboard.
What options do I have for flyer formats in my EDDM campaign?
There are different flyer formats that you can choose for your EDDM campaign:
Small (11.6" x 4.25")
Best seller (9" x 6.25")
Large (11" x 6.25")
Jumbo (11" x 8.5")
Oversized (15" x 12")
You can download the respective PDFs with detailed instructions on cut marks, bleed areas, safety areas, and so on, to each format by clicking on them above.
